|
|
Heled is the first and central realm which Adam visits throughout his journey, and an ancient name of the Earth[1]. The main locations in this realm are the Mansion, the vicarage of Adam's father and the church of St. Michael.
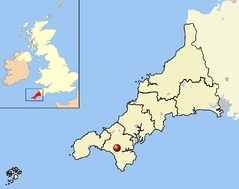
Helston shown within Cornwall
Until his death, Adam's father was the pastor in the small Cornish village of Helston which provides the general setting for Realms of the Haunting. Its name comes from a large slab that some say was used to block the entrance to Hell and which was, thus, referred to as "Hell's Stone". According to legend, this stone was being carried by the devil before he was challenged by the town's patron saint, St. Michael. In their ensuing combat, the stone was dropped and left to the town. For many years, it lay in the rear courtyard of the Angel Inn. But the stone is no longer whole, in 1783 it was broken up and used for building materials. The remains are now part of the west wall of the renamed Angel Hotel. They can be recognized as two black stones that are set in the wall, under a window found in an alley adjacent to the hotel. They are marked by the grooves of coaches that passed over them during its days in the courtyard.[2]
|
Locations in Heled
|
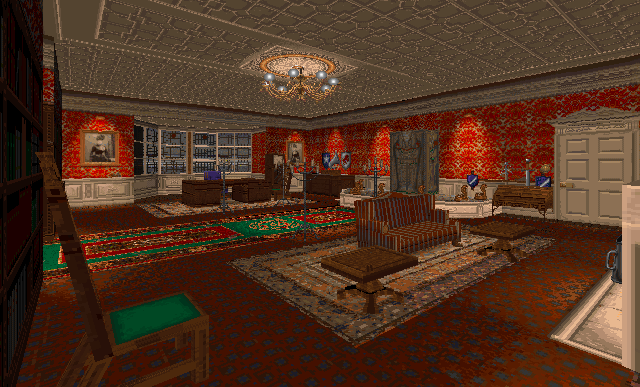
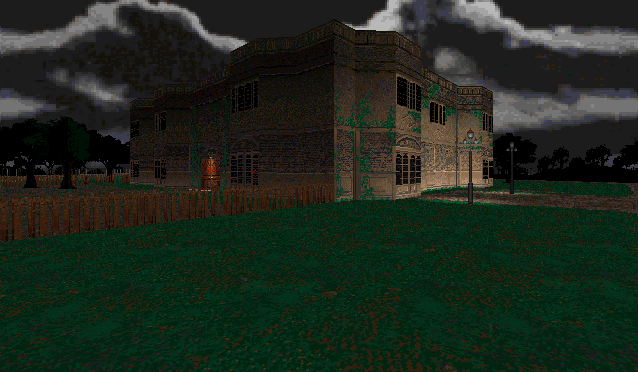
The Mansion[]
| The Mansion | |

| |
| “ |
I know not how it was --but, with the first glimpse of the building, a sense of insufferable gloom pervaded my spirit. I say insufferable; for the feeling was unrelieved by any of that half-pleasurable, because poetic, sentiment, with which the mind usually receives even the sternest natural images of the desolate or terrible. I looked upon the scene before me --upon the mere house, and the simple landscape features of the domain --upon the bleak walls --upon the vacant eye-like windows --upon a few rank sedges --and upon a few white trunks of decayed trees --with an utter depression of soul which I can compare to no earthly sensation more properly than to the after-dream of the reveller upon opium --the bitter lapse into everyday life --the hideous dropping off of the veil. There was an iciness, a sinking, a sickening of the heart --an unredeemed dreariness of thought which no goading of the imagination could torture into aught of the sublime. What was it --I paused to think --what was it that so unnerved me in the contemplation of the House of Usher? |
” |
—Edgar Allan Poe, The Fall of the House of Usher, 1839 (excerpt). | ||
Following the untimely death of his father, Adam started to have nightmares of great vividity about a house on the outskirts of a village even before actually setting foot into the mansion in Helston. The house is very strange and seems to have a life of its own. The doors initially bear green, glowing symbols and have no locks, disembodied voices such as the laughter of children resonate through certain parts of the house.
Vestibule and Typewriter Room[]
After the doors have slammed shut behind us, effectively trapping us inside the house, we try to familiarize ourselves with our gloomy surroundings. To our considerate bewilderment, the first thing to strike our attention off in the distance is a framed pair of sinister eyes ![]() that are quite obviously looking back at us, in a "New Labour, New Danger"[3] sort of way. The doors are covered with a variety of curiously glowing
that are quite obviously looking back at us, in a "New Labour, New Danger"[3] sort of way. The doors are covered with a variety of curiously glowing ![]() Wards. Fortunately, we do not have to fumble about in the dark for too long as we find a
Wards. Fortunately, we do not have to fumble about in the dark for too long as we find a ![]() Lantern and a
Lantern and a ![]() Box of Matches conveniently placed on a small table to the right side of the main entrance (as seen in
Box of Matches conveniently placed on a small table to the right side of the main entrance (as seen in ![]() Shadows, the opening cinematic of the game).
On the small side table to the left side of the entrance we spot 1
Shadows, the opening cinematic of the game).
On the small side table to the left side of the entrance we spot 1 ![]() Magazine of Colt-45 Ammunition and a copy of Thomas Wolfe's Look Homeward, Angel.
Magazine of Colt-45 Ammunition and a copy of Thomas Wolfe's Look Homeward, Angel.
Drawn by the rarity of a well-lit room looming in front of us, we proceed through a dark corridor that's lined with windows, and notice with some repulsion the pungent stench that seems to transpire from a ![]() Suit of Armor. As we set foot into the afore-mentioned room, a Typewriter starts to hammer off of its own accord, even though there's no ink ribbon and some of the keys are missing, leaving a
Suit of Armor. As we set foot into the afore-mentioned room, a Typewriter starts to hammer off of its own accord, even though there's no ink ribbon and some of the keys are missing, leaving a ![]() cryptic message and us in a state of perplexity. Apart from that, we pick up a
cryptic message and us in a state of perplexity. Apart from that, we pick up a ![]() Colt-45, another
Colt-45, another ![]() Magazine, and a Scrapbook containing a Newspaper Cutting
Magazine, and a Scrapbook containing a Newspaper Cutting ![]() on the phenomenon of crop circles.
on the phenomenon of crop circles.
Two of the four doors at our disposal are warded with ![]() white pentagrams, so we proceed through one of the remaining doors that both lead into the same corridor. With agitation we notice some oversized footprints and a dead rat by an open window, and fancy now a good opportunity to jump out but alas, those plans of an early ending to our nightmares have been thwarted by the game's developers, as climbing outside is apparently physically impossible for Adam.
white pentagrams, so we proceed through one of the remaining doors that both lead into the same corridor. With agitation we notice some oversized footprints and a dead rat by an open window, and fancy now a good opportunity to jump out but alas, those plans of an early ending to our nightmares have been thwarted by the game's developers, as climbing outside is apparently physically impossible for Adam.
With all the doors in the hallway being sealed ![]() for now, our only option is moving up the blue-carpeted staircase in front us, at the very end of which we're somewhat startled to find our despondent self looking back at us. The mirror that's hung up on the wall can actually be considered a clue: turning back down the first flight of steps and entering the corridor to our left, we happen upon the painting of a Sarcophagus, with a candle stick placed on either side. On the opposite side, we've already passed a window with two candle stands that can be lit by using the matches we found in the vestibule. Reproducing, nay mirroring that very procedure on the candles by the painting, we uncover a secret stash containing a
for now, our only option is moving up the blue-carpeted staircase in front us, at the very end of which we're somewhat startled to find our despondent self looking back at us. The mirror that's hung up on the wall can actually be considered a clue: turning back down the first flight of steps and entering the corridor to our left, we happen upon the painting of a Sarcophagus, with a candle stick placed on either side. On the opposite side, we've already passed a window with two candle stands that can be lit by using the matches we found in the vestibule. Reproducing, nay mirroring that very procedure on the candles by the painting, we uncover a secret stash containing a ![]() brass key which is used to access the nearby Study.
brass key which is used to access the nearby Study.
The Study[]
| The Study | |
| |
For a more elaborate look at the Study, please go to the separate article.
Upon entering the Study for the first time, Adam meets an apparition of his father, put in chains and wearing a peculiar ![]() pendant around his neck which he refers to as his "jailer", begging him to free his restless soul. He vaguely talks about a very serious conflict which is about to happen between two adversaries he does not explicitly name, and he also mentions Aelf who he advices his son to find as he will be like a brother to him and provide guidance. Adam's father is, then, seized by four armoured figures and vanishes:
pendant around his neck which he refers to as his "jailer", begging him to free his restless soul. He vaguely talks about a very serious conflict which is about to happen between two adversaries he does not explicitly name, and he also mentions Aelf who he advices his son to find as he will be like a brother to him and provide guidance. Adam's father is, then, seized by four armoured figures and vanishes:
![]() In the name of the Father.
In the name of the Father.
The Study is richly decorated with various thrusting and slashing weapons (some of which Adam identifies as a Scimitar and a Claymore), coats of arms, three masks, and paintings, one of them depicting Florentine. In said picture, Florentine is holding a book which Rebecca later on identifies as his journal.
In one corner of the room stands a grandfather clock which has stopped at 8 o'clock. The hands don't work anymore but oddly enough, the clock is still ticking. When manually setting the clock to 6 o'clock, it will chime. This is a hint for a later part in the game.
Throughout the Study are spread several gold leaf ![]() Serpent Statuettes which are part of the puzzle surrounding the
Serpent Statuettes which are part of the puzzle surrounding the ![]() Sarcophagus. Adam needs to collect all seven of them (some of which can only be found later on) and place them on the circular indentations in front of the Egyptian receptacle. Upon putting the last one in its place, the statuettes will start to glow and the Sarcophagus will open up, revealing a new passage that lead to Hawk's Prison.
Sarcophagus. Adam needs to collect all seven of them (some of which can only be found later on) and place them on the circular indentations in front of the Egyptian receptacle. Upon putting the last one in its place, the statuettes will start to glow and the Sarcophagus will open up, revealing a new passage that lead to Hawk's Prison.
The Sarcophagus also serves as a teleporter between various locations in the Mansion, provided that Adam is in possession of Florentine's Staff (found in the Observatory). Using the Staff on the left side of the Sarcophagus will get him teleported to the Observatory. Using it on the right side of the Sarcophagus, sends him back to where he meets Aelf for the first time, after having inserted the Shrive into the large door inside the Mausoleum). It's a convenient shortcut, in case you've missed the Serpent Statuette that's hidden in one of the alcoves.
The bookcase opposite the Sarcophagus contains a hidden door which leads to the Mausoleum.
The Mausoleum[]
| The Mausoleum | |
| |
For a detailed walkthrough of this area, please go to the main article: Mausoleum
The Mausoleum constitutes the first major dungeon type of area in the game. It is also setting for several important events: receiving the Marks and the Shrive, and meeting Aelf for the first time who from then on will provide guidance. Adam will also encounter Claude Florentine who he already became acquainted with prior to entering the house, disguised as the priest Elias Camber. After emerging safely from the Mausoleum, Adam will meet Rebecca Trevisard and continue on his journey with her assistance.
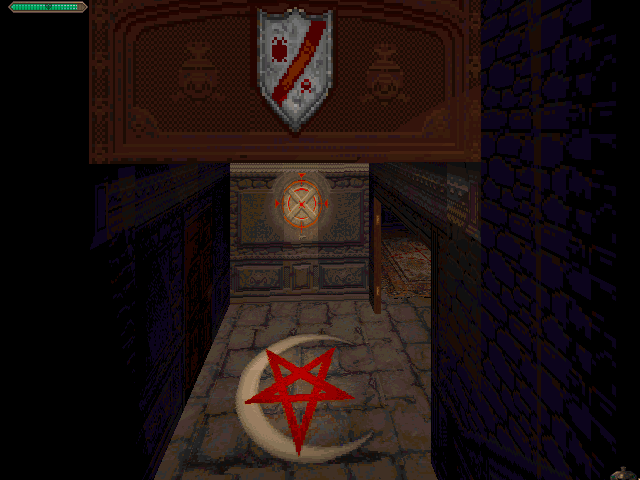
Apparently, Florentine attempted to delve into this place as early as 1929, considering the Map ![]() that bears his initials. Not having the Marks (and the Shrive), his investigations came to a premature end, as he could neither access the Holy Shrine nor the section beyond the double-winged door
that bears his initials. Not having the Marks (and the Shrive), his investigations came to a premature end, as he could neither access the Holy Shrine nor the section beyond the double-winged door ![]() that features two knights and the Shrive symbol (illustrated by his despaired "Qu'y a-t-il de l'autre cote [sic] de la Porte?" written at the bottom of the map).
that features two knights and the Shrive symbol (illustrated by his despaired "Qu'y a-t-il de l'autre cote [sic] de la Porte?" written at the bottom of the map).
Dormitory, Armoury, Gallery[]
 |
 |
 |
|
|---|
After safely returning from the Mausoleum, Adam makes the acquaintance of Rebecca Trevisard, a woman he recalls from his dreams: ![]()
Now that some of the Wards have vanished, we're free to explore more sections of the house. Exiting the Study and descending the blue-carpeted staircase, we enter the dark corridor to our left, where we happen upon a small room with a peculiar green dome in the centre of it. At present, we lack the item to make use of it though.
Continuing just a few steps further along the corridor, there's another room to our right, filled with wooden lockers. Next to the entrance, we discover a differently coloured tile on the floor which reveals itself to be a pressure plate that opens a nearby door, containing the considerably useful ![]() Map of the labyrinthian Mansion.
Map of the labyrinthian Mansion.
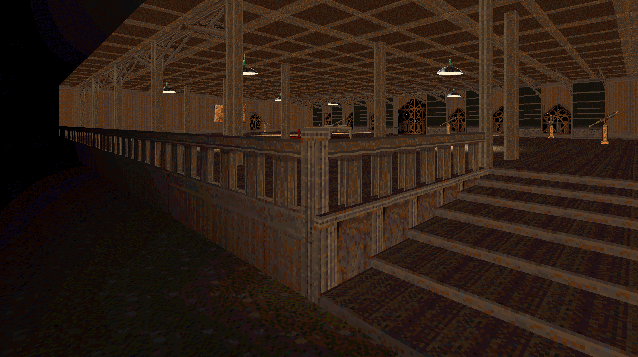
Dormitory
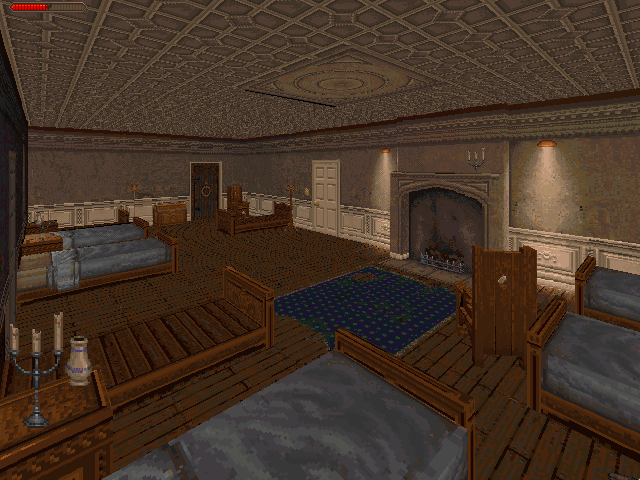
Our meanderings eventually lead us to a Dormitory which apparently has not been used and tended to in quite a while and thus, is filled with a rather unpleasant smell. The floor's creaking noticeably under our weight, sparking a random musing:
Is the noisy Nightingale Floor in Raysiel's Tower supposed to be an allusion to this room?
Apart from the usual furnishing associated with such a room (an extinguished fireplace, various bedsteads and bedside cabinets, clothes stands and chairs), there's nothing remarkable about this place, except for a valuable ![]() Red Potion up on the mantelpiece and an old chest which, upon closer inspection, serves to open the stout door with the doorknocker to the right side of it.
Red Potion up on the mantelpiece and an old chest which, upon closer inspection, serves to open the stout door with the doorknocker to the right side of it.
Exiting the Dormitory, we take a left turn and happen upon a sword and shield hung up on a wall, which are in surprisingly good condition and radiate a residual trace of power; turning the sword upside down reveals a hidden mechanism which lets us access the adjacent door leading to the Armoury to our right, and another room upfront which contains a curious pedestal of sorts, a so-called tower gate. Approaching it, we hear a whispering voice informing us that "[the] Tower is close traveller. You have no Rite [sic] of Passage. Find the mask... find the mask."
Armoury
Exiting the room, we decide to explore the afore-mentioned Armoury. By using her Pendant, Rebecca will telegraph an external event to Adam, in which we witness Gaul magically warding the front door of the Mansion and leaving an Ace of Spades playing card, on which is written: "Adam, now it begins."![]() Gaul - 'Coming Events...'
Gaul - 'Coming Events...'
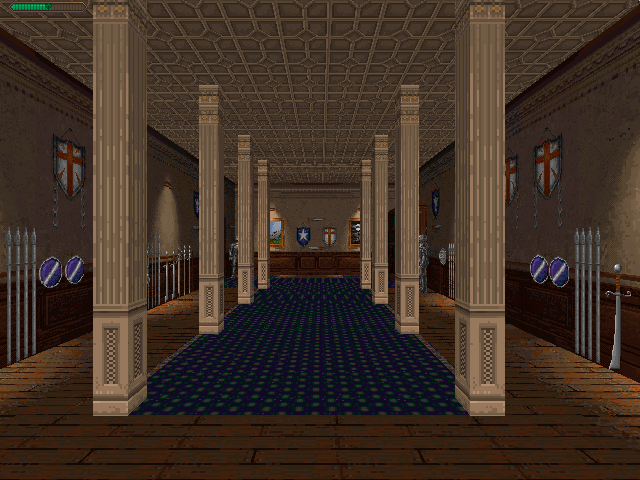
As expected, the room itself is stocked with ![]() plenty of shields and both slashing and thrusting weapons (Claymores, Scimitars, Axes, Spears), as well as more of those suits of armour that we've already become familiar with from wandering around the house. Several coats of arms and daggers are hung up on the walls.
plenty of shields and both slashing and thrusting weapons (Claymores, Scimitars, Axes, Spears), as well as more of those suits of armour that we've already become familiar with from wandering around the house. Several coats of arms and daggers are hung up on the walls.
Moving further to the back to take a look at the painting ![]() of Florentine dressed as a Templar, we're bewildered by the sudden disembodied laughter of children resonating through the room and are subsequently attacked by two Skeletons. Our reward in defeating them is a generous stash of six
of Florentine dressed as a Templar, we're bewildered by the sudden disembodied laughter of children resonating through the room and are subsequently attacked by two Skeletons. Our reward in defeating them is a generous stash of six ![]() Shotgun Cartridges, as well as an
Shotgun Cartridges, as well as an ![]() Incomplete Map of the afore-mentioned Tower, hidden up on the bookshelf on the opposite side of the entrance.
Incomplete Map of the afore-mentioned Tower, hidden up on the bookshelf on the opposite side of the entrance.
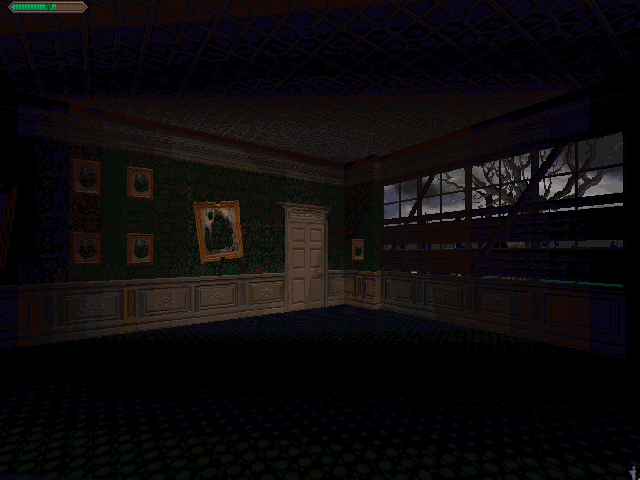
Gallery
Proceeding forward along the dark and stony hallways, we enter the room on the opposite side of the Dormitory exit (curiously, there's water dripping from the ceiling by the door), which reveals itself to be a Gallery of sorts, and find that the windows have been boarded up and all the paintings have been ripped off from the frames. We're surprised by a minor Yielder attacking us from the dark and eventually stumble upon an ![]() Old Knight's Helm placed on the floor in front of a worn-down map of the world, referred to as Realm of Heled. Rebecca has difficulties classifying the helm's period, stating that it's very stylized. Clicking the item inside the inventory triggers a cutscene,
Old Knight's Helm placed on the floor in front of a worn-down map of the world, referred to as Realm of Heled. Rebecca has difficulties classifying the helm's period, stating that it's very stylized. Clicking the item inside the inventory triggers a cutscene, ![]() Fall of Angels, in which we learn more about the decline of the noble Falshire Knights and Aelf. We exit the Gallery through the double-winged door next to the map tapestry and discover the
Fall of Angels, in which we learn more about the decline of the noble Falshire Knights and Aelf. We exit the Gallery through the double-winged door next to the map tapestry and discover the ![]() Ace of Spades card that we saw Gaul drop in the Armoury movie clip, down in front of the Mansion's main entrance. On the card is written: "Adam, now it begins."
Ace of Spades card that we saw Gaul drop in the Armoury movie clip, down in front of the Mansion's main entrance. On the card is written: "Adam, now it begins."
Gnarl's Domain[]
From the Main Hall we revisit the Typewriter Room and are now able to access the door to our right, which was hitherto sealed by a ![]() white pentagrammic ward, allowing us to enter a dark room with wooden panelling and rather sparse furnishing, consisting of a bookcase, two chairs and candle sticks, and a small table from which we gratefully take the
white pentagrammic ward, allowing us to enter a dark room with wooden panelling and rather sparse furnishing, consisting of a bookcase, two chairs and candle sticks, and a small table from which we gratefully take the ![]() Map of the Caverns. As soon as we set foot into the room next to the bookcase, a sliver of
Map of the Caverns. As soon as we set foot into the room next to the bookcase, a sliver of ![]() uncut crystal magically appears in the fireplace and we find that, to our considerable surprise, our hands are not burnt off upon removing it. Other than the smoke-damaged maps of Europe and the world, there's nothing to catch our fancy, so we decide to leave and are immediately surprised by a minor and a major Yielder.
uncut crystal magically appears in the fireplace and we find that, to our considerable surprise, our hands are not burnt off upon removing it. Other than the smoke-damaged maps of Europe and the world, there's nothing to catch our fancy, so we decide to leave and are immediately surprised by a minor and a major Yielder.
Returning to the Typewriter Room and proceeding forward through the door to the right side of the typewriter sideboard, we can now revisit the room in front of us, the one with the curious green dome in the centre of it. Inserting the green crystal into the small aperture, Adam will be teleported to a place of Egyptian character, the Gnarl's Domain. Passing the Gnarl's test, we receive the masks ![]() which are required to travel to the Tower. Hence we head off, passing the Dormitory and the Armoury on our way, and revisit the room with the tower gate. Equipping the Egyptian Masks, we're finally taken to that curious location and make the physical acquaintance of its guardian, Raphael, whose disembodied voice had just beckoned us with the following mantra:
which are required to travel to the Tower. Hence we head off, passing the Dormitory and the Armoury on our way, and revisit the room with the tower gate. Equipping the Egyptian Masks, we're finally taken to that curious location and make the physical acquaintance of its guardian, Raphael, whose disembodied voice had just beckoned us with the following mantra:
Combine the face with the soul traveller... become as one to walk the Tower.
Know that you stand before the Tower and possess the Right of Passage.

(If you wish to follow this walkthrough chronologically, please click on the icon above to continue reading the segment in which we explore the Tower.)
Memory's Garden[]
After our first voyage to the Tower, we end up in the central and largest courtyard of the Mansion: Memory's Garden. The eponymous cutscene, ![]() Memory's Garden, which is triggered after stepping off the tower gate gives us an impression of cold and sinister desolation: an ominously red moon, skeletons hanging from a leafless tree, and numerous stone statues, some of them headless (potentially "blasted off," according to Rebecca) and others whispering unnerving mantras like "The Marked One approaches", "Will he destroy us or save us?" and "Take us back to the Gardens".
Memory's Garden, which is triggered after stepping off the tower gate gives us an impression of cold and sinister desolation: an ominously red moon, skeletons hanging from a leafless tree, and numerous stone statues, some of them headless (potentially "blasted off," according to Rebecca) and others whispering unnerving mantras like "The Marked One approaches", "Will he destroy us or save us?" and "Take us back to the Gardens".
There are two pools of water, out of one of them we fish the ![]() Outhouse Key, required to access the small nearby room containing the useful Rune Guide which holds information about the four Realms and their respective symbol, and should thus alleviate our navigation through the Tower.
Outhouse Key, required to access the small nearby room containing the useful Rune Guide which holds information about the four Realms and their respective symbol, and should thus alleviate our navigation through the Tower.
The parchment scroll is protected by a green ward ![]() though, taking it triggers a threatening voice message and the appearance of two duos of both minor and major Yielders outside in the courtyard.
though, taking it triggers a threatening voice message and the appearance of two duos of both minor and major Yielders outside in the courtyard.
Opposite the outhouse, there's another small and entirely dark room which will only spawn a single minor Yielder upon entering. After dealing with all the creatures, we return to the central tower gate, triggering Chapter V: The Offering. If you wish to follow this walkthrough chronologically, please click on the following icon to continue reading about our travels through the Tower.
Chapel and Basement[]

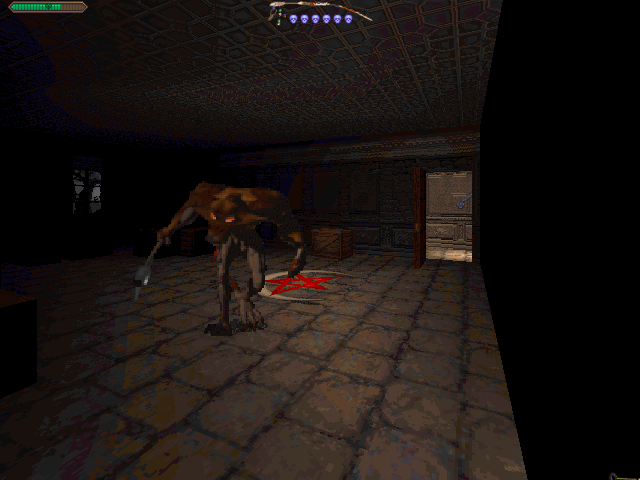
Demon Zone-Marker and Bull's Eye. Door to Chapel on the left side.
Returning from our short jog through the Tower and cautiously stepping off the gate, the green ward ![]() on the adjacent door will explode, allowing us to proceed forward into the basement of the House. Additionally, a glowing hand symbol
on the adjacent door will explode, allowing us to proceed forward into the basement of the House. Additionally, a glowing hand symbol ![]() has appeared on the wall beside the tower gate, pressing it will lower a plinth in the Basement, revealing a
has appeared on the wall beside the tower gate, pressing it will lower a plinth in the Basement, revealing a ![]() demon zone-marker[4] and a bull's eye, allowing us to deal with a certain type of creature
demon zone-marker[4] and a bull's eye, allowing us to deal with a certain type of creature ![]() roaming the area before the Caverns, which is invincible to our arsenal of mundane and magic weapons.
roaming the area before the Caverns, which is invincible to our arsenal of mundane and magic weapons.

Chapel
Descending the small staircase in front of the zone-marker, we're surprised to find a small Chapel[5] to our left. As our attention is drawn to the golden key up on the ceiling, we're attacked by two minor Yielders. After dealing with them, we're free to stand on the indentation in the back of the room and place one of the ![]() Serpent Statuettes we've collected so far on the golden floor panel in front of us, revealing a raising plinth that takes us up to the
Serpent Statuettes we've collected so far on the golden floor panel in front of us, revealing a raising plinth that takes us up to the ![]() Tiny Room Key.
Tiny Room Key.

Basement Area with Demon Zone-Marker and Loper.
Next to the zone-marker, there's a Magical Rug ![]() whose weave incorporates a safety device, standing on it protects us from the imminent attack of the Lopers, presaged by the pair of demolished doors on the floor, whose hinges have been torn away. There's another zone-marker in the following room, from which three of those monsters will spawn. Equipping our
whose weave incorporates a safety device, standing on it protects us from the imminent attack of the Lopers, presaged by the pair of demolished doors on the floor, whose hinges have been torn away. There's another zone-marker in the following room, from which three of those monsters will spawn. Equipping our ![]() Creator's Staff and luring them back to the first zone-marker, we can safely crush them by shooting at the bull's eye from the staircase.
Creator's Staff and luring them back to the first zone-marker, we can safely crush them by shooting at the bull's eye from the staircase.
In the following area, we're baffled to see more water dripping from the ceiling and our path impeded by various wooden boxes. Using the key we picked up in the Chapel, we can access a tiny room though. There's a lever for us to pull which will spawn another Loper, a necessary inconvenience as the creature will push aside the crates, allowing us to proceed forward through the hitherto blocked door.
From another small room beyond we gather a welcome stash of 3 ![]() Colt-45 Magazines, 2
Colt-45 Magazines, 2 ![]() Shotgun Cartridges and 1
Shotgun Cartridges and 1 ![]() Green Potion, and are surprised by another major Yielder out to harm us. Our travels eventually lead us to a Crypt in which we're contacted by a disembodied voice, asking us to re-dress the balance, by seeking the holy place: the Chamber of the Soulstone.
Green Potion, and are surprised by another major Yielder out to harm us. Our travels eventually lead us to a Crypt in which we're contacted by a disembodied voice, asking us to re-dress the balance, by seeking the holy place: the Chamber of the Soulstone.
The Caverns[]

| |
For a detailed walkthrough of this area, please go to the main article: Caverns
The Caverns constitute the interlink between the house and Florentine's Observatory.
Before entering the actual dungeon, Adam and Rebecca pass through some sort of crypt, characterised by a rumbling ambient noise, various chest tombs and incense burners of Persian origin, according to Rebecca. Some of the walls feature murals with depictions of angels. Here they are contacted for the first time by the disembodied voice of Hawk who asks them to restore the Balance by seeking the Chamber of the Soulstone.
The actual challenge of the Caverns consists in finding a ![]() Red Gem and give it as an offering to a
Red Gem and give it as an offering to a ![]() Red Effigy that's guarding a bridge leading us to the Observatory.
Red Effigy that's guarding a bridge leading us to the Observatory.
It's an arduous endeavour as the Caverns are an unsurprisingly dark and inhospitable area, filled with nasty creatures that spawn incessantly and pursue Adam and Rebecca into every nook, making navigation even more difficult. As such, the Map ![]() that can be found on the bookshelf in the Mansion's Armoury is a valuable vademecum.
that can be found on the bookshelf in the Mansion's Armoury is a valuable vademecum.
Florentine's Cottage and Observatory[]
| The Observatory | |
| |
For a more elaborate look at and an actual walkthrough of the Observatory of Claude Florentine, please go to the separate article.
Florentine's Cottage and Observatory[6] is a complex of several rooms which lies beyond the Caverns. Four of Florentine's Journal entries were written here, dating as far back as the year 1330 and hence give us an idea as to how old this place actually is. The walls of three of the rooms have agitated writings on them which are directed at Florentine.
The actual observatory is full of references to Venus, which is also referred to as "Morning Star", the Latin equivalent being "Lucifer" which can be translated as "Light-bearer" (from the Latin lux, gen. lucis, "light", and ferre, "to bear, bring"). In Christian theology, the term "Lucifer" has come to be associated with Satan as the fallen "son of the dawn"[7]. In the latter passage the title of "Morning Star" is given to the tyrannous Babylonian king, who the prophet says is destined to fall. This passage was later applied to the prince of the demons, and so the name "Lucifer" came to be used for Satan, and was popularized in works such as Dante's Inferno and Milton's Paradise Lost, while one of the greatest influence (at least on English speakers) certainly has been its use in the King James Version of the Bible (more modern English versions translate the term as "Morning Star" or "Day Star"). The word "Lucifer" has also frequently been used by early Latin writers such as Cicero[8], Pliny the Elder[9], Vergil[10], and Statius[11].
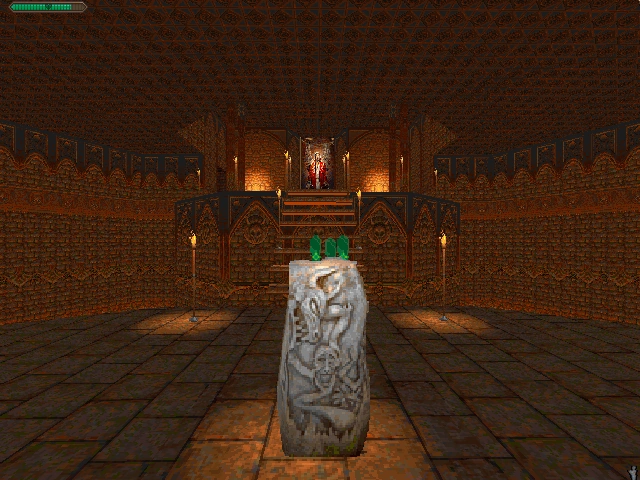
Beyond the Sarcophagus[]
| Hawk's Prison | |
| |
For a more in-depth exploration of this place, please go to the main article: Hawk's Prison
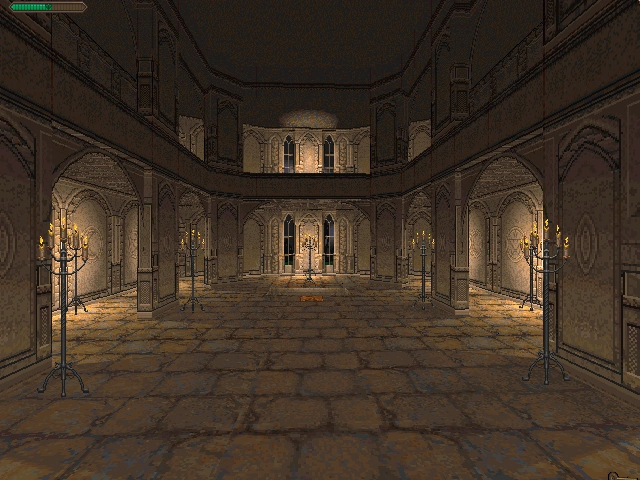
When Adam places all seven of the ![]() Serpent Statuettes on the indentations in front of the Sarcophagus inside the Study, the Egyptian receptacle will open up and reveal a hallway leading to a spacious circular hall whose floor is defined by a large clock. Setting its hands to six o'clock by using the two levers found when ascending the small staircase on one side of the room, will open up the portal on the opposite side. The walls are richly covered with depictions of knights protecting themselves from fire-breathing dragons by using their shields, serving as a clue to equip the
Serpent Statuettes on the indentations in front of the Sarcophagus inside the Study, the Egyptian receptacle will open up and reveal a hallway leading to a spacious circular hall whose floor is defined by a large clock. Setting its hands to six o'clock by using the two levers found when ascending the small staircase on one side of the room, will open up the portal on the opposite side. The walls are richly covered with depictions of knights protecting themselves from fire-breathing dragons by using their shields, serving as a clue to equip the ![]() Dragon Shield, as our progression will be impeded by a fire trap.
Dragon Shield, as our progression will be impeded by a fire trap.
This hall is succeeded by a chamber where ![]() Aelf's Dagger, the device to enter the Realm of Raquia, is hidden. This is a prerequisite for finding the
Aelf's Dagger, the device to enter the Realm of Raquia, is hidden. This is a prerequisite for finding the ![]() Key of Tears which is necessary to free Hawk. The central feature of this chamber is a
Key of Tears which is necessary to free Hawk. The central feature of this chamber is a ![]() circular mosaic depicting an angel put in chains which serves as a seal to keep Hawk imprisoned. Once we've acquired the Key of Tears from Raysiel, the guardian force of Raquia, and inserted it into the respective lock, the seal will break.
circular mosaic depicting an angel put in chains which serves as a seal to keep Hawk imprisoned. Once we've acquired the Key of Tears from Raysiel, the guardian force of Raquia, and inserted it into the respective lock, the seal will break.
Before that though, we find ourselves confronted with Belial who demands the ![]() Shrive. Using Aelf's Dagger allows us to put him to flight for the time being. In search of a portal to the Realm of Raquia, we return to the Study.
Shrive. Using Aelf's Dagger allows us to put him to flight for the time being. In search of a portal to the Realm of Raquia, we return to the Study.
Pentacle Room, Refectory, Second Major Courtyard (Portcullis)[]
After our unpleasant first encounter with Doctor Belial beyond the Sarcophagus, we're confronted with a task force of 3 ![]() Shadows and 3
Shadows and 3 ![]() Icons out to foil our plans of searching for a portal to Raquia and subsequently the Key of Tears. Eventually we find ourselves back in the rare safety provided by the Study walls, allowing us to take a breather. Having gathered new courage, we cautiously leave and are immediately attacked by two major Yielders.
Icons out to foil our plans of searching for a portal to Raquia and subsequently the Key of Tears. Eventually we find ourselves back in the rare safety provided by the Study walls, allowing us to take a breather. Having gathered new courage, we cautiously leave and are immediately attacked by two major Yielders.
As our meanderings lead us back to the Mansion's vestibule, the green ward ![]() on the door in front of us will explode and trigger the appearance of 1
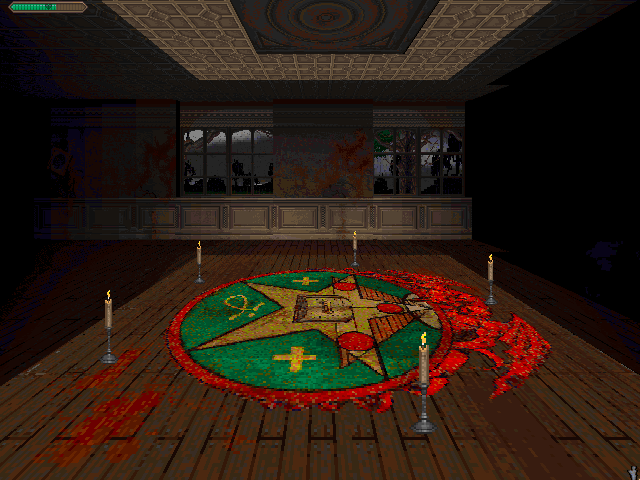
on the door in front of us will explode and trigger the appearance of 1 ![]() Shadow. Following along the unlit corridor now open for exploration, we make out various worn-down tapestries with axes adorning the wooden panelling, and eventually reach a dark room whose walls are characterised by numerous empty frames and blood splattered all over them. On the floor we spot a laboriously executed painting
Shadow. Following along the unlit corridor now open for exploration, we make out various worn-down tapestries with axes adorning the wooden panelling, and eventually reach a dark room whose walls are characterised by numerous empty frames and blood splattered all over them. On the floor we spot a laboriously executed painting ![]() displaying occult iconography, which will spawn a major Yielder upon closer inspection. Lighting all the five candles that are placed around it, we summon a necessary evil
displaying occult iconography, which will spawn a major Yielder upon closer inspection. Lighting all the five candles that are placed around it, we summon a necessary evil ![]() whose defeat will yield us a small
whose defeat will yield us a small ![]() Quartz Idol holding a book; the statuette will serve as a key and allow us to access two specific locations later on: Florentine's Library and the Temple of the Morning Star (subsequently leading us to the Realm of Raquia).
Quartz Idol holding a book; the statuette will serve as a key and allow us to access two specific locations later on: Florentine's Library and the Temple of the Morning Star (subsequently leading us to the Realm of Raquia).
![]() Mark of the Beast
Mark of the Beast
The pentacle room leaves us with two more doors to explore, and it should be noted that the House will become considerably more labyrinthian at this point.
From the entrance we originally came into as our point of reference, we decide to take the door to our left first and set foot into a room with a wooden staircase that leads up to a boarded-up door, next to which we discover a small locker, containing 1 ever-welcome ![]() Green Potion and 2
Green Potion and 2 ![]() Shotgun Cartridges.
Shotgun Cartridges.
Returning to the pentacle room, we open the second door at our disposal. Progressing straight forward through another door, we move up a small stony staircase that's covered with countless dead rats and discover with some frustration another dysfunctional and blood-smeared tower gate. Remembering Raphael's words, we speculate that the gate's connection to the Tower must have been corrupted by the Ire:
![]() The Ire Encroaches
The Ire Encroaches
Leaving this room and taking a right turn, we eventually reach the Mansion's Refectory, decorated with the usual assortment of objects we've already encountered in other parts of the Mansion, namely various Coats of Arms, Daggers, and Suits of Armour. There's a small stash of 4 ![]() Colt-45 Magazines in the back of the room, as well as 2
Colt-45 Magazines in the back of the room, as well as 2 ![]() Green Potions and 1
Green Potions and 1 ![]() Red Potion placed on the sprawling dining table in between several candelabra. Picking up the latter triggers a duo of major Yielders.
Red Potion placed on the sprawling dining table in between several candelabra. Picking up the latter triggers a duo of major Yielders.
Leaving the Refectory through the second door at hand, we find ourselves at a junction: by keeping to the left, we find a small locker next to an otherwise blocked staircase, from which we gather a Die ![]() (that's obviously been placed there with no pun intended), and 1
(that's obviously been placed there with no pun intended), and 1 ![]() Shotgun Cartridge.
Shotgun Cartridge.
Backtracking to the afore-mentioned junction after the Refectory, another door leads us through a number of wooden and stony corridors, allowing us to access a spacious courtyard whose main feature appears to be the imposing portcullis that we spot off in the distance. Walking down the stairs to take a closer look, we find that the gate's been chained shut and enchanted with an extra-strong spell. To the right side, stashed in between several dead rats, there's another ![]() Green Potion. To the left side of the portcullis, a door opens up to a room that's again characterised by a foul stench, probably originating from the various skeletons scattered across the lowered floor. Before we have time to investigate any further, we're attacked by a
Green Potion. To the left side of the portcullis, a door opens up to a room that's again characterised by a foul stench, probably originating from the various skeletons scattered across the lowered floor. Before we have time to investigate any further, we're attacked by a ![]() Spite, a creature that will burst into numerous green spheres upon defeat. To the opposite side of the entrance, we discover a new weapon, the Flintlock, reminiscent of 19th century grenade launchers. Taking it immediately triggers 2
Spite, a creature that will burst into numerous green spheres upon defeat. To the opposite side of the entrance, we discover a new weapon, the Flintlock, reminiscent of 19th century grenade launchers. Taking it immediately triggers 2 ![]() Shadows, and another trio of them as we return to the courtyard.
Shadows, and another trio of them as we return to the courtyard.
Moving up the second staircase at our disposal, we happen upon yet another dysfunctional tower gate. Proceeding straight forward we eventually reach Florentine's Library, which requires the ![]() Quartz Statuette to enter. Initiation of Chapter VII: By the Seven be Bound.
Quartz Statuette to enter. Initiation of Chapter VII: By the Seven be Bound.
Florentine's Library[]
The Library of Claude Florentine is a room that becomes accessible after having acquired the small ![]() Quartz Idol from inside the room with the occult floor painting. The Library is protected by a security spirit, a disembodied guard inquiring a code:
Quartz Idol from inside the room with the occult floor painting. The Library is protected by a security spirit, a disembodied guard inquiring a code: ![]() Library Guard
Library Guard
| “ |
Welcome, Master Florentine. I trust you are well. And what will it be today Sir? Unfortunately I was not able to locate the book yoou asked me to find. Shall I procure a cup of Darjeeling for you Sir? Some Brandy perhaps? Are you looking for anything in particular Sir? What do you intend to do with Hawk Sir? Raysiel sent another Emissary this morning. The Urges still report the intruders are within the grounds. Are there any special orders you wish for me to pass onto them? Belial was by last even Sir. The Ward held as usual. Master Florentine. Forgive me, but does something trouble you? Your reticence is unusual. The Dodger is close Master Florentine. Your scout reports antoher attempt to leave the Tower. Sir, please forgive me, but due to your lack of response your instructions require me to ask of you the library code. I'm sure you understand. Sir, please forgive me again, but further to my request, you have failed to procure the library code. Under your instructions, I must ask you one further time. Failure to reply will result in the instigation of your security measure. Failure to reply. Intruder in Library. |
” |
As the library code is unbeknownst to us, we're immediately attacked by a trio of ![]() major Yielders, one inside the actual room and two more outside in the stony corridor preceeding the Library. Defeating them allows us to take a closer look at our surroundings which turn out to be largely unremarkable, as the bookshelves are almost entirely relieved of their contents. Adorning one of the walls, there's a smoke-damaged map of Europe and a tapestry depicting a hand tightly gripped around a green orb.
major Yielders, one inside the actual room and two more outside in the stony corridor preceeding the Library. Defeating them allows us to take a closer look at our surroundings which turn out to be largely unremarkable, as the bookshelves are almost entirely relieved of their contents. Adorning one of the walls, there's a smoke-damaged map of Europe and a tapestry depicting a hand tightly gripped around a green orb.
In addition to 1 ![]() Green Potion and another
Green Potion and another ![]() Quill and Ink set, we gather a series of interesting documents:
Quill and Ink set, we gather a series of interesting documents:
- a Complete Map of the Tower
- a hand-written text relating somebody's journey to Raquia, Arqua and Sheol
- a text on Raquia and Raysiel
- a parchment on historical and legendary Cornwall.
Leaving the Library (and picking up the Quartz Statuette again), the security spirit kindly bids us farewell and we continue back along the corridor, taking the door to our right, which opens up to a small courtyard, filled with more of the whispering statues that we've already familiarised ourselves with during our exploration of Memory's Garden. As our attention is drawn to the tower gate placed in an alcove, a cutscene is triggered, in which Adam and Rebecca witness the, thankfully short-lived, appearance of the Dodger. Rebecca suggests a causality between the creature and the destruction of the tower gate: ![]() The Beast at the Gate
The Beast at the Gate
Leaving the courtyard, we decide to walk down the staircase to our right, with more water trickling down upon our heads, and are soon confronted with another ![]() major Yielder. Keeping right we discover a door with another lock to use the small
major Yielder. Keeping right we discover a door with another lock to use the small ![]() Quartz Idol on, triggering the appearance of a
Quartz Idol on, triggering the appearance of a ![]() minor Yielder in the process. Progressing straight forward our investigation ends prematurely in front of a
minor Yielder in the process. Progressing straight forward our investigation ends prematurely in front of a ![]() warded door, situated on the left side of the small courtyard we've just been in.
warded door, situated on the left side of the small courtyard we've just been in.
Walking back we decide to explore what's beyond the door to our right, opening up to a series of somewhat labyrinthian, stony hallways. With a certain apprehension, we decide to follow the trail of dead rats distinguishing one of the paths at hand. Eventually we reach a bright room with a pool of water on the ground, and proceed up a small flight of stairs, with locker rooms on either side. The metal door in front of us leads us to the Temple of the Morning Star.
Temple of the Morning Star[]
| Temple of the Morning Star | |
| |
|
| |
If you'd like to read more about the history and the workings of the Order, please go to the main article: Temple of the Morning Star
The Temple of the Morning Star refers to both the Templar Order founded by Claude Florentine as well as its conventicle which is located in the basement of the Mansion. The Temple was initiated by Florentine in 1316[12], with the intention to destroy the Seven Seals, open the Gate to the Abyss and call upon Satan's power. Thus, the Power of Satan can take a physical form on Earth before the Power of God.
When first setting foot into this place, Adam and Rebecca will eavesdrop on Gaul who takes one of four green crystals from an altar stone in the centre of the room, solemnly speaking the following words:
| “ |
By the seven be bound, by the seven to come... the power of one, thy will be done. |
” |
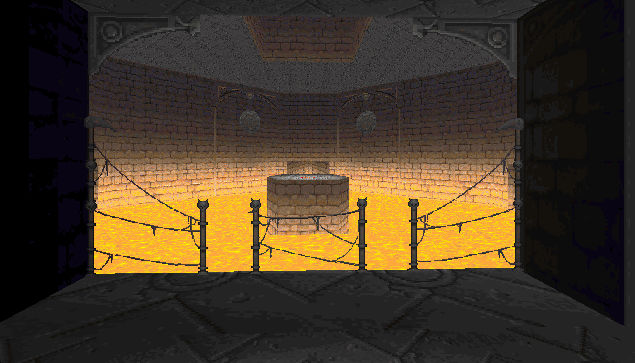
After the cutscene, we're free to take in our surroundings, which are quite reminscent of Hawk's Prison. On the floor we spot another summoning sign as well as several fire pits. The place is filled with numerous torches which, according to Rebecca's musings, are of a magical nature and might have been lit for years. Investigating the weird carvings on the altar stone, Rebecca suggests that they might not be carvings after all, commenting that the carvings seem to be moving. The three green crystals (from which we're allowed to take one) feel odd to the touch, Rebecca senses a particularly strong power emanating from them.
As we move up the small flight of stairs in front us, we're overwhelmed by the heat originating from the imposing basin of seething lava beneath our feet. As we approach the altar in the backside of the chamber, our attention falls on the ![]() impressive large tapestry depicting Lucifer.[13]
impressive large tapestry depicting Lucifer.[13]
Turning around, we notice a lever on the backside of the afore-mentioned altar that opens a nearby door, behind which lies the tower gate that will lead us to the Realm of Raquia. If you wish to follow this walkthrough chronologically, please click on the following icon to continue reading about our search for the portal to Raquia in the Tower.
Return to Hawk's Prison[]
After safely returning from Raquia and finally in possession of the Key of Tears, we make haste to free Hawk from inside his prison. Back inside the Temple of the Morning Star, there's 1 ![]() Shadow and 1
Shadow and 1 ![]() Loper out to thwart our plans, as well as another
Loper out to thwart our plans, as well as another ![]() Spite attacking us inside the bright room with the pool of water. Backtracking the path that's covered with dead rats, we're now being confronted with 4 of those noisy
Spite attacking us inside the bright room with the pool of water. Backtracking the path that's covered with dead rats, we're now being confronted with 4 of those noisy ![]() Feints attempting to cut us into bite-sized pieces. After safely emerging from these labyrinthian hallways, we take the door to our right (the one that originally required the small
Feints attempting to cut us into bite-sized pieces. After safely emerging from these labyrinthian hallways, we take the door to our right (the one that originally required the small ![]() Quartz Idol to open), and follow along the path to our right, passing a pair of candelabra for us to shed some light on the dark stonewalling that a few steps further will segue into a wooden corridor which eventually leads us back to the Gallery and subsequently, the Mansion's Vestibule. The Study's only a stone's throw away from here. Hopping down the hole by the Sarcophagus and following along the straightforward path, we eventually reach Hawk's Prison and insert the Key of Tears into the peculiar lock in the rear part of the seething chamber. The central mosaic
Quartz Idol to open), and follow along the path to our right, passing a pair of candelabra for us to shed some light on the dark stonewalling that a few steps further will segue into a wooden corridor which eventually leads us back to the Gallery and subsequently, the Mansion's Vestibule. The Study's only a stone's throw away from here. Hopping down the hole by the Sarcophagus and following along the straightforward path, we eventually reach Hawk's Prison and insert the Key of Tears into the peculiar lock in the rear part of the seething chamber. The central mosaic ![]() will break, allowing us to finally meet Hawk in person. After our lengthy conversation with him, in which he discloses a multitude of valuable information to us, we're allowed to move up the ethereal staircase that will lead us to the old vicarage of Adam's father and the church he used to practice at.
will break, allowing us to finally meet Hawk in person. After our lengthy conversation with him, in which he discloses a multitude of valuable information to us, we're allowed to move up the ethereal staircase that will lead us to the old vicarage of Adam's father and the church he used to practice at.
Charles Randall's Vicarage[]
| |
For a more elaborate look at the Vicarage, please go to the separate article.
The Vicarage of Charles Randall is an edifice situated opposite the church of St. Michael where Adam's father, pastor Charles Randall, used to dwell before his death.
We visit this place after having freed Hawk from his prison, by using the Key of Tears that we arduously earned ourselves in completing Raysiel's trials in Raquia.
As soon as we step off the tower gate, we're welcomed by a quartet of Belial's Shadows.
The Vicarage main entrance is protected by a ![]() red lemniscatic ward which will explode of its own accord when approaching it, leaving the doors open for entrance. We've actually seen a demonstration of the sealing process as telegraphed by Rebecca in an early cutscene:
red lemniscatic ward which will explode of its own accord when approaching it, leaving the doors open for entrance. We've actually seen a demonstration of the sealing process as telegraphed by Rebecca in an early cutscene: ![]() Gaul - 'Coming Events...'
Gaul - 'Coming Events...'
In this particular movie clip, we witness Gaul lighting a match and performing a specific hand motion, creating a red lemniscatic ward on the main entrance of a house (probably the Mansion in this case, which is why we cannot leave it).
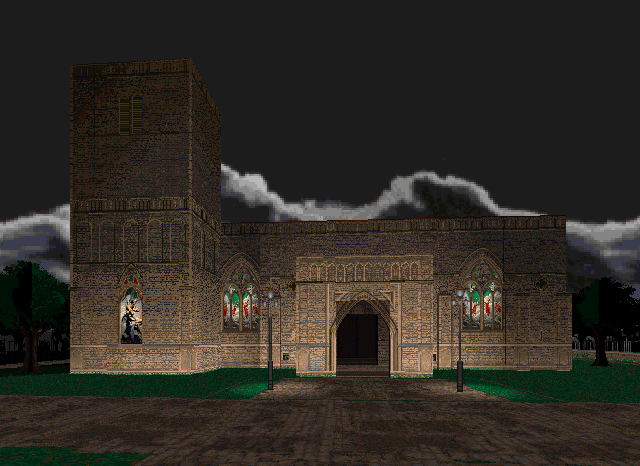
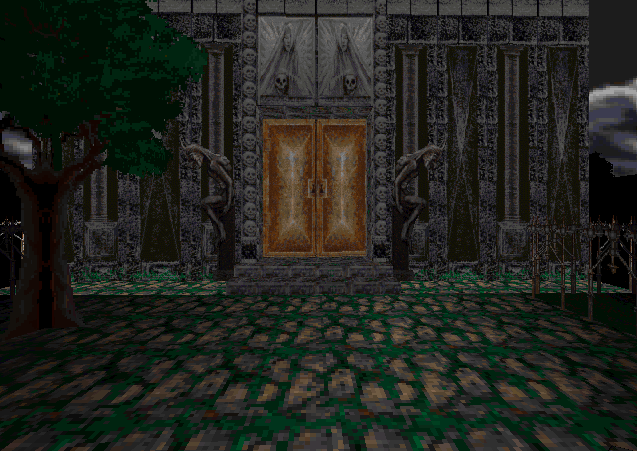
St. Michael's[]
| |
For a more elaborate look at the Church of St. Michael, please go to the separate article.
The Church of St. Michael is an edifice situated opposite the vicarage of Charles Randall and can be accessed after having freed Hawk with the Key of Tears. At present, the church is suffering from signs of dilapidation, especially the roof is in danger of collapsing. Consequently, there's a collection box at the entrance and a church fund pamphlet asking for donations required for its restoration.
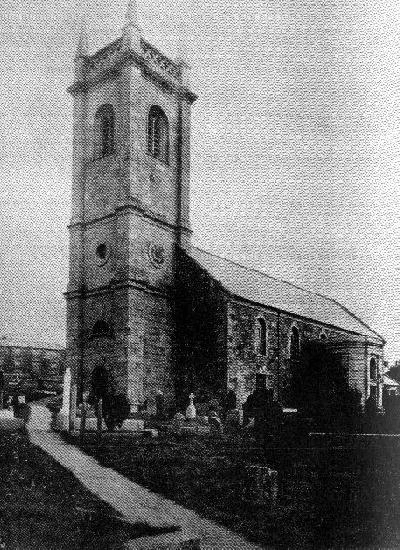
The real St. Michael's[]

One of Helston's most prominent features, the Parish Church of St. Michael, is a large rectangular building of Elvan stone, with granite dressings, which was erected in 1763 by Francis, second and last Earl of Godolphin, as a replacement of an earlier construction which had been struck by lightning in 1727 and had burnt down in the process. Also, the church in Helston was originally a daughter church to the mother church in Wendron. In 1845, Helston had grown sufficiently in population to justify the parish of Wendron being divided into two parishes, something that happened in many places.
Belial's Prison[]
| |
Main article: Belial's Prison
After having solved the riddle in Arqua and on returning back to Heled through the Tower, precisely shortly after having stepped on the Heled mantle stone, Adam and Rebecca encounter Belial and several of his minions who drag along Adam's father. As Adam attempts to attack Belial he is immediately seized and imprisoned in a cell in Belial's prison which is situated beyond a graveyard lying on the backside of the mansion. The graveyard itself leads off into a maze which harbours a tower gate to Sheol.
Etymology[]
The Legends of the Jews, written by Louis Ginzberg as a continuous narrative based on classical rabbinic literature, as well as apocryphal, pseudopigraphical and even early Christian literature, speak of seven earths which God created according to the seven heavens.
| “ |
Over the lowest earth, the seventh, called Erez, lie in succession the abyss, the Tohu, the Bohu, a sea, and waters. Then the sixth earth is reached, the Adamah, the scene of the magnificence of God. In the same way the Adamah is separated from the fifth earth, the Arka, which contains Gehenna, and Sha'are Mawet, and Sha'are Zalmawet, and Beer Shahat, and Tit ha-Yawen, and Abaddon, and Sheol, and there the souls of the wicked are guarded by the Angels of Destruction. In the same way Arka is followed by Harabah, the dry, the place of brooks and streams in spite of its name, as the next, called Yabbashah, the mainland, contains the rivers and the springs. Tebel, the second earth, is the first mainland inhabited by living creatures, three hundred and sixty-five species, all essentially different from those of our own earth. Some have human heads set on the body of a lion, or a serpent, or an ox ; others have human bodies topped by the head of one of these animals. Besides, Tebel is inhabited by human beings with two heads and four hands and feet, in fact with all their organs doubled excepting only the trunk. It happens sometimes that the parts of these double persons quarrel with each other, especially while eating and drinking, when each claims the best and largest portions for himself. This species of mankind is distinguished for great piety, another difference between it and the inhabitants of our earth. |
” |
—Louis Ginzberg, Legends of the Jews: Ch. 1, The Creation of the World, § 22-27[14] | ||
References[]
- ↑ Louis Ginzberg, Legends of the Jews:
"Our own earth is called Heled, and, like the others, it is separated from the Tebel by an abyss, the Tohu, the Bohu, a sea, and waters.
Thus one earth rises above the other, from the first to the seventh, and over the seventh earth the heavens are vaulted, from the first to the seventh, the last of them attached to the arm of God. The seven heavens form a unity, the seven kinds of earth form a unity, and the heavens and the earth together also form a unity." - ↑ Ian Addicoat: Haunted Pubs of the South West
- ↑ Quoted from the PC Format #65 article.
- ↑
“ Adam: Hey. What's this?
Rebecca: Looks like a zone-marker, marking a magical boundary.
Adam: Judging by the mess, I'd say these... creatures were forbidden to pass beyond this marker.
Rebecca: Classical demon zone-marker. Very effective.” - ↑ Also referred to as Shrine in the texture description: SHRINWA1.shrine wall with lite.bmp
- ↑ This area is referred to as "ancient cottage" in the official solution by Interplay, the game's publisher: "The key opens a door across the corridor from the Shrine. Through this door you will find a lever. This moves a series of crates to reveal the next point of egress, a hidden doorway leading down into the caverns - which leads to Florentine's ancient cottage and observatory. Collect the hidden ammo behind the door."
- ↑ Isaiah 14:12
- ↑ De Natura Deorum 2, 20, 53
- ↑ Natural History 2, 36
- ↑ Georgics 3:324-325
- ↑ Thebaid (Latin poem) 2, 134-150
- ↑ According to the timeline printed in issue 65 of PC Format magazine.
- ↑ As referred to in the texture desccription.
- ↑ Ginzberg, Louis. Legends of the Jews: Ch. 1, The Creation of the World, § 22-27.