The Key to the Abyss is not to be understood in the mundane and physical sense of the word, but refers to the various tests and puzzles that we need to pass and solve in order to gain access to the Chamber of the Soulstone.
First Test: Brains[]
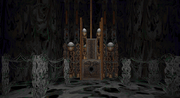
The first area of Sheol is a gloomy plain. When leaving the ![]() dimension gate in the centre, we'll be attacked by a
dimension gate in the centre, we'll be attacked by a ![]() Wielder. Subsequently, the plain starts to demerge into various terraces which Adam has to descend in order to find 16 brains
Wielder. Subsequently, the plain starts to demerge into various terraces which Adam has to descend in order to find 16 brains ![]() and feed them to an automaton. The brains are scattered across the floor but are also hidden inside the various disorienting tunnels that characterise the architecture of this level. Shedding some light on the confusing layout of this place, Derell Licht has kindly provided a hand-drawn
and feed them to an automaton. The brains are scattered across the floor but are also hidden inside the various disorienting tunnels that characterise the architecture of this level. Shedding some light on the confusing layout of this place, Derell Licht has kindly provided a hand-drawn ![]() Map of the Brain Maze.
Map of the Brain Maze.

Depository for the sixteen collected brains
After having put all the brains into the automaton, a bell will toll announcing the appearance of Vine[1], a powerful creature who has dominion over this area, will appear and initiate a fight. Defeating him will level the terraces again and reward us with the ![]() Power of Dominion scroll, which will protect Adam from an illusion created by Belial, in which he finds Rebecca chained to a rock on the Island of Threads, prompting him to let down his guard and consequently giving Belial the opportunity to snatch away Eternity and the Shrive.
Power of Dominion scroll, which will protect Adam from an illusion created by Belial, in which he finds Rebecca chained to a rock on the Island of Threads, prompting him to let down his guard and consequently giving Belial the opportunity to snatch away Eternity and the Shrive.
Second Test: Mirrors[]
Upon arriving in the Halls of Doppelgangis, Adam meets an apparition, a doppelganger of his, who tells him that "Goodness reflects the light and evil bears the seed of all darkness. Choose well, and the gate shall be yours." In the center of the Halls, Adam spots Abaddon who is bound by a red light by Florentine. After their conversation, Adam is supposed to dash the various mirrors which are set up within the circular hallway surrounding the hall. If he gets too close to a mirror, a demon, ![]() Doppelgangis, will appear which is invincible to Adam's weapons and can only be obliterated by dashing the mirror when the demon is reflected in it.
Doppelgangis, will appear which is invincible to Adam's weapons and can only be obliterated by dashing the mirror when the demon is reflected in it.
Third Test: Puzzles[]
After having smashed all the mirrors in the Halls of Doppelgangis, Adam is allowed to enter the archway behind the throne and enter a rotunda with eight puzzles which constitutes the third test to the Key of the Abyss, also referred to as Level of Salvation in the official Interplay walkthrough.[2]
The challenge here is to solve eight puzzles and turn a series of wheels in order to remove the circle of fire that's blocking the ![]() dimension gate. After having completed these trials, Adam will have to overcome Pyrichiel[2] himself in order to receive the
dimension gate. After having completed these trials, Adam will have to overcome Pyrichiel[2] himself in order to receive the ![]() Perdition Shield which will protect him from fire.
Perdition Shield which will protect him from fire.
Solution table for quick reference[]
| # | Room | Solution |
|---|---|---|
 |
Stand on the third square from the left (brown), and assuming that North is in front of you, go N 3 times, W 2 times, N 2 times and E 3 times. Enter and press the hand. Turn around and go to the edge. With N behind you now, advance S x 2, E x 2, S x 3, W x 1, N x 1, W x 1, S x 1, W x 2, S x 1. OK, go to the next niche on your left.[3] | |
 |
Facing north, imagine that you have 7 spaces going down, which we will call them, N to S, 1 to 7; and then 4 spaces going across, W to E, A to D. Place the blocks in the following spaces: 7A, 6B, 5C, 4B, 3C, 2C, 1B. Press End to see what you are doing, walk transversally on the blocks, get into the corridor and press the hand in the circle.[3] | |
 |
Apply your right shoulder to the wall and follow it. If you come across a mirror, keep your right shoulder on it and continue. Eventually you'll come to a circle with a hand. Press it, apply your left shoulder to the wall and go out the way you came in.[3] | |
 |
You have to break a mirror by bouncing a shot from ball to ball. The direction of the shot can be configured by setting the dials in a specific pattern. Please refer to the screenshot on the left for the correct solution. | |
 |
Deactivate the stone wall by shooting or punching to reveal a set of gems. Use the weapon in front of you to shoot all of them while making adjustments through the arrows. | |
 |
Supposing the levers were numbered 1 to 7, from left to right, pull 2, 3, 7 and 5; then press the button and the gun will shoot the mirror. Press the button again. Now pull 2, 6, 5. Press the button twice.[3] | |
 |
You need to press the upper right and the bottom left hand in order to gain access to the plinth inside the maze and press the hand symbol which it bears. | |
 |
Jump over the illuminated platforms in a zig-zag manner as stepping on them will trigger a series of fireballs. Find the first of 4 moving mirrors which is not protected by a magical barrier. Smashing it will deactivate the shield of another mirror. Lastly, enter the room opposite the entrance and jump on the stone block. |
References[]
- ↑ Official Interplay Walkthrough: "Level One - Dominion: Vine, the major demon and Master of Dominion rules this level. To successfully traverse this level you must collect 'brains' and place them in the brain machine. This lowers the platforms to allow exit. Defeat Vine and the Power of Dominion is granted. This shields Adam from Illusions."
- ↑ 2.0 2.1 Official Interplay Walkthrough: "Level Three - Salvation: Pyrichiel, major demon and Master of Fire rules this level. This level is traversed by successfully turning a series of wheels until a central circle of fire is absolved and the Gate back is revealed. At this point the Power of Salvation is granted. This shields Adam from Fire."
- ↑ 3.0 3.1 3.2 3.3 Walkthrough by Lu Richardson